Last Updated on September 15, 2025 by Practical Astrophotography Staff
Astrophotography is a pursuit that blends science, art, and adventure, allowing enthusiasts to capture the breathtaking beauty of the night sky. For those seeking the ultimate experience, venturing to a remote Bortle 2 location—where light pollution is minimal and the stars shine with unparalleled clarity— offers an unrivaled opportunity to photograph celestial wonders. These pristine skies, often found in isolated wilderness areas far from urban sprawl, present unique challenges due to the lack of power and amenities. However, with the right equipment, planning, and techniques, you can achieve stunning results. This article explores the essentials of remote astrophotography, focusing on portable power solutions like the Anker Power Station, and provides a comprehensive guide to succeeding in these challenging yet rewarding conditions.
Understanding the Bortle 2 Sky
The Bortle Scale, developed by astronomer John E. Bortle, measures the brightness of the night sky due to light pollution, ranging from Class 1 (darkest) to Class 9 (brightest, urban skies). A Bortle 2 location is nearly pristine, with only slight light pollution visible near the horizon, often from distant towns. These skies allow for exceptional astrophotography, revealing faint nebulae, galaxies, and intricate details of the Milky Way that are invisible in brighter conditions. Such locations are typically found in remote wilderness areas, requiring significant travel—either by driving or hiking—to reach. The absence of power and amenities in these areas means you must be entirely self-sufficient. From powering your telescope mount and camera to keeping warm in potentially cold conditions, preparation is key. Below, we’ll dive into the equipment, techniques, and strategies needed to make your remote astrophotography expedition a success.
Essential Equipment for Remote Astrophotography
Telescopesssssss and Mount For astrophotography, a telescope or a high-quality lens is critical for capturing detailed images of deepsky objects like galaxies, nebulae, and star clusters. A compact apochromatic Refractor, such as the William Optics RedCat 51 or a small Takahashi, is ideal for remote setups due to its portability and sharp optics. For wide-field astrophotography, a camera lens with a Focal Length of 50–300mm (e.g., a Canon EF 70-200mm f/2.8) paired with a DSLR or mirrorless camera can produce stunning results. The mount is equally important, as it must track the stars’ motion to prevent blurring during long exposures. A portable equatorial mount like the Sky-Watcher Star Adventurer or iOptron SkyGuider Pro is popular for lightweight setups, while more advanced options like the Sky-Watcher EQ6-R Pro can handle heavier rigs if you’re driving to your location. For hiking, prioritize weight and compactness, as you’ll be carrying your gear over potentially long distances.
- Camera A dedicated astrophotography camera, such as the ZWO ASI294MC Pro (a one-shot-color cooled camera), is ideal for capturing faint celestial objects. Cooling reduces noise during long exposures, which is critical in remote settings where you can’t afford to waste imaging time. Alternatively, a modified DSLR or mirrorless camera (e.g., Canon EOS Ra or Sony A7III) with good low-light performance can suffice, especially for beginners. Ensure you have extra batteries, as cold nights can drain them quickly.
- Portable Power: The Anker Power Station Power is a critical concern in remote locations with no access to electrical outlets. A reliable portable power station is essential to keep your mount, camera, dew heaters, and other accessories running through a long night of imaging. The Anker Power Station, particularly models like the Anker 757 PowerHouse, is a favorite among astrophotographers for its reliability and capacity. The Anker 757 PowerHouse, with a 1500W (1228Wh) capacity and LiFePO4 batteries, can power a robust astrophotography setup for multiple nights. Its 13 output ports, including a 12V DC car-socketstyle port, USB ports, and 110V AC outlets, accommodate various devices, from telescope mounts to laptops. Weighing 44 pounds, it’s best suited for car-based trips rather than long hikes, but its built-in handles and durable aluframe make it manageable for short carries. Its silent operation is a significant advantage, avoiding the noise of gas-powered generators that could disrupt the serene wilderness experience. For lighter setups or hiking, consider the Anker PowerHouse II 400 (300W/388.8Wh), which is more portable at around 10 pounds. While it has less capacity, it can still power a minimalist setup (e.g., a Star Adventurer, camera, and dew heater) for a full night. For example, a user on Cloudy Nights reported using a Jackery 500 (similar in capacity) to power a mount, camera, and small computer for an entire winter night, drawing about 350W with some headroom. The Anker PowerHouse II 400 is comparable, but always measure your setup’s power draw with a wattmeter to ensure compatibility. Key features to look for in a power station include: Constant Voltage: Ensures stable power delivery to sensitive electronics like mounts and cameras. High Capacity: At least 300–500Wh for a single night, more for multinight trips. Multiple Output Ports: Accommodate various devices with 12V DC, USB, and AC options. Fast Charging: The Anker 757 can charge from 0% to 80% in about an hour, ideal for recharging via solar panels or a car during the day. Durability: Vibration and temperature resistance are crucial for rugged outdoor conditions.
- Dew Heaters and Accessories In remote Bortle 2 locations, nights can be cold and humid, leading to dew formation on lenses and mirrors, which can ruin images. Dew heaters (e.g., Kendrick or Celestron dew heater bands) wrap around your optics to keep them above the dew point. These draw significant power, so ensure your power station can handle them alongside other equipment. A power hub, like the Pegasus Astro Pocket Powerbox, simplifies cable management by distributing power to multiple devices from a single source. Other accessories include: Laptop or Control Device: An ASI Air Plus or a small laptop for controlling your setup and acquiring images. Red Flashlight: Preserves night vision while setting up. Star Tracker Apps: Apps like Stellarium or SkySafari help locate targets in the sky. Filters: In Bortle 2 skies, light pollution filters are less necessary, but narrowband filters (e.g., H-alpha) can enhance nebula imaging.
- Support Gear Tripod or Pier: A sturdy tripod is essential for stability, especially on uneven terrain. For driving, a portable pier can provide a solid base. Camping Gear: A tent, sleeping bag, and warm clothing are vital for multi-night trips. A foldable solar panel can recharge your power station during the day. Navigation Tools: A GPS device or offline maps (e.g., Gaia GPS) ensures you can find and return from your remote location safely.
Planning Your Remote Astrophotography Trip
1. Choosing a Bortle 2 Location Finding a true Bortle 2 location requires research. Use light pollution maps (e.g., lightpollutionmap. info) to identify areas with minimal skyglow, typically found in national parks, forests, or deserts far from cities. Examples include parts of Death Valley National Park (California), the Black Rock Desert (Nevada), or remote areas of the Australian Outback. Verify accessibility by checking road conditions or trail difficulty, especially if hiking. Ensure the site is safe and legal for overnight camping, as some areas may have restrictions.
2. Timing and Weather Check moon phases, as a bright moon can wash out faint objects even in Bortle 2 skies. New moon periods are ideal for deep-sky imaging. Use weather apps like Clear Outside or Scope Nights to confirm clear skies, and monitor forecasts for temperature and humidity, which affect equipment performance and dew formation.
3. Power Management Calculate your setup’s power consumption to ensure your power station can last the night. For example, a typical astrophotography rig (mount, camera, dew heaters, and laptop) might draw 20–50W continuously. A 10-hour imaging session at 50W requires 500Wh, so a power station like the Anker 757 (1228Wh) provides ample headroom, while the PowerHouse II 400 (388.8Wh) may require careful management for longer sessions. Always bring a backup battery or a solar panel for multi-night trips.
4. LOGISTICS Driving: If driving, pack efficiently to fit your telescope, mount, power station, and camping gear. A roof rack or trailer can help with larger setups. Hiking: For hiking, prioritize lightweight gear. A Star Adventurer (3–5 pounds) and a small power station like the Anker PowerHouse II 400 are feasible for backpacking. Use a sturdy backpack with padding to protect equipment. Safety: Inform someone of your plans, carry a first-aid kit, and bring enough food and water for your trip. In remote areas, cell service may be unreliable, so a satellite communicator (e.g., Garmin inReach) is a wise investment.
Techniques for Successful Astrophotography
1. Setup and Alignment In a remote location, setting up efficiently is crucial to maximize imaging time. Practice assembling your gear at home to streamline the process. Polar align your mount using a polar scope or software like SharpCap to ensure accurate tracking. In Bortle 2 skies, the dense star field makes alignment easier, but take time to get it right to avoid star trailing.
2. Image Acquisition Long Exposures Bortle 2 skies allow for longer exposures (1–5 minutes) to capture faint details without light pollution overwhelming the signal. Stack multiple exposures to improve the signal-to-noise ratio. Focus: Achieve precise focus using a Bahtinov Mask or software autofocus tools. Check focus periodically, as temperature changes can cause lens contraction. Guiding: For advanced setups, use an autoguider to correct for minor tracking errors, ensuring sharp images over long exposures.
3. Post-Processing Post-processing is critical to bring out the details captured in Bortle 2 skies. Software like PixInsight, DeepSkyStacker, or Adobe Photoshop can stack and enhance your images. Adjust levels, curves, and color balance to highlight faint nebulae and galaxies while reducing any residual noise.
Challenges and Solutions
- Cold Temperatures Cold nights in remote areas can drain batteries faster and affect equipment performance. Keep batteries warm by storing them in an insulated bag when not in use. The Anker 757’s temperature-resistant design helps, but monitor its performance in extreme cold.
- Dew Management Dew can form quickly in humid conditions. Use dew heaters from the start of your session, and consider a dew shield for added protection. Ensure your power station can handle the additional draw (typically 5–10W per heater).
- Equipment Failures In remote locations, there’s no quick fix for broken gear. Test all equipment thoroughly before your trip, and bring spares for critical components like cables and adapters. A user on Cloudy Nights described a failed Celestron Power Tank 17 in a Bortle 2–3 location, highlighting the importance of reliable power.
- Fatigue and Comfort Long nights in the wilderness can be exhausting. Set up a comfortable camp with a chair, warm clothing, and hot drinks to stay alert. Automate your imaging with tools like ASI Air to minimize manual intervention, allowing you to rest while capturing data.
Why Choose a Bortle 2 Location?
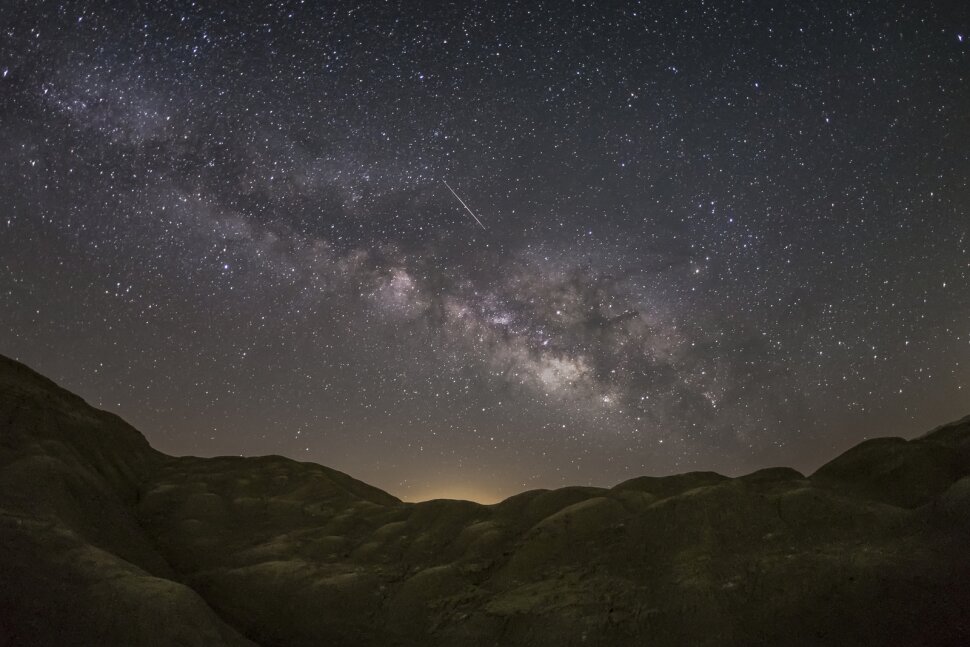
The effort of traveling to a Bortle 2 location is rewarded by unparalleled sky quality. Unlike urban or suburban skies (Bortle 6–9), where light pollution limits imaging to bright objects, Bortle 2 skies reveal intricate details of faint deep-sky objects. The low skyglow reduces the need for aggressive filtering, allowing for more natural color and contrast in your images. The experience of being under such a pristine sky—where the Milky Way casts shadows—is also a profound connection to the universe, blending the technical challenge of astrophotography with the awe of nature.
Conclusion
Remote astrophotography in a Bortle 2 location is a thrilling endeavor that pushes the boundaries of both photography and adventure. With careful planning, reliable equipment like the Anker Power Station, and a passion for the cosmos, you can capture images that rival those from professional observatories. The key is preparation: choose the right gear for your needs, calculate power requirements, and anticipate environmental challenges. Whether you’re hiking to a mountaintop or driving to a desert, the reward of photographing the universe from a pristine sky is worth every effort. So pack your gear, charge your power station, and embark on a journey to capture the stars like never before. +


