Last Updated on May 13, 2025 by Practical Astrophotography Staff
Choosing the right intervalometer for your photography needs involves several considerations to ensure you get a device that will work effectively with your camera and meet your specific requirements. Here’s a step-by-step guide on how to select an intervalometer:
1. Compatibility with Your Camera:
- Brand and Model: Check if the intervalometer is compatible with your camera brand (like Canon, Nikon, Sony, etc.) and the specific model. Some intervalometers are designed for specific camera systems, while others might require adapters or have universal compatibility.
- Connection Type: Ensure the intervalometer has the correct cable or connector for your camera. Cameras often have different ports, so compatibility in terms of physical connection is crucial.
2. Features:
- Basic vs. Advanced Features: Decide if you need a simple intervalometer for basic time-lapse photography or one with advanced features like HDR support, mirror lock-up, or exposure ramping.
- Delayed Start: Useful if you need to set up the shot and leave the camera unattended for a while.
- Shutter Speed Control: For long exposures, you need an intervalometer that can handle exposures longer than 30 seconds (typically in bulb mode).
- Number of Shots: Look for one that allows you to set a large number of shots or has an infinite option for extended time-lapses.
- Interval Setting: Check if the interval between shots can be finely adjusted.
3. Wired or Wireless:
- Wired: Typically more reliable, cheaper, but less convenient if you need to be far from the camera.
- Wireless: Offers more freedom but might require battery management for both the camera and the intervalometer or its remote.
4. Ease of Use:
- User Interface: An intervalometer should be straightforward to use, with clear displays or intuitive controls. If possible, look for user reviews or try one out to see if the interface suits you.
5. Durability and Build:
- Build Quality: If you plan to use it in harsh environments (like outdoors for astrophotography), consider durability, weather resistance, or at least whether it comes with a protective case.
6. Battery Life:
- Check the battery requirements and life of the intervalometer. Some use common batteries like AA, which is convenient, while others might need proprietary batteries.
7. Price:
- Intervalometers can range from very affordable (around $12) to more expensive models with advanced features. For beginners, a basic model might suffice, but as your skills and needs grow, you might want to invest in a more feature-rich device.
8. Reviews and Recommendations:
- Look up reviews on photography forums, YouTube, or sites like Digital Photography Review, Reddit (e.g., r/AskAstrophotography), or blogs like ExpertPhotography.com, Shotkit.com, or DigitalCameraWorld.com. User feedback can be invaluable in deciding which intervalometer best fits your needs.
9. Brand Trustworthiness:
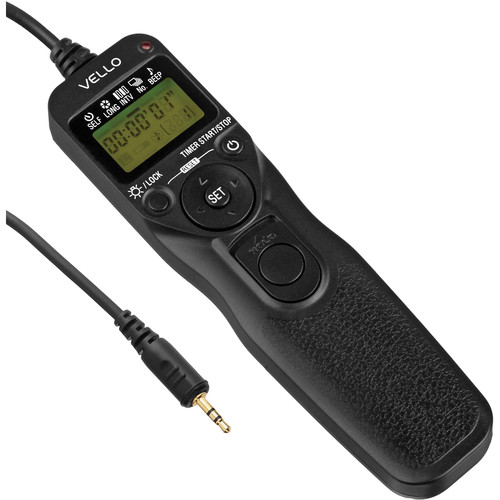
- Brands like Neewer, Vello, Pholsy, and others are popular in the photography community. Researching known brands can help ensure reliability and customer support.
10. Additional Considerations:
- Future Proofing: If you plan to upgrade your camera, consider an intervalometer with interchangeable cables or one that’s likely to be compatible with future models.
- Special Features: Some intervalometers might offer additional utilities like bulb ramping for dawn/dusk time-lapses where lighting conditions change.
By considering these points, you’ll be able to select an intervalometer that not only fits your current photographic needs but also supports your growth as a photographer. Remember, the best intervalometer for one photographer might not be ideal for another, so tailor your choice to your specific circumstances and goals.


