Last Updated on September 15, 2021 by Practical Astrophotography Staff
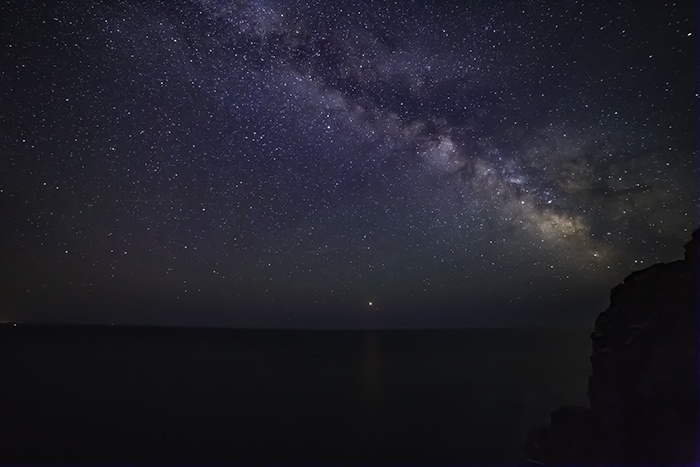
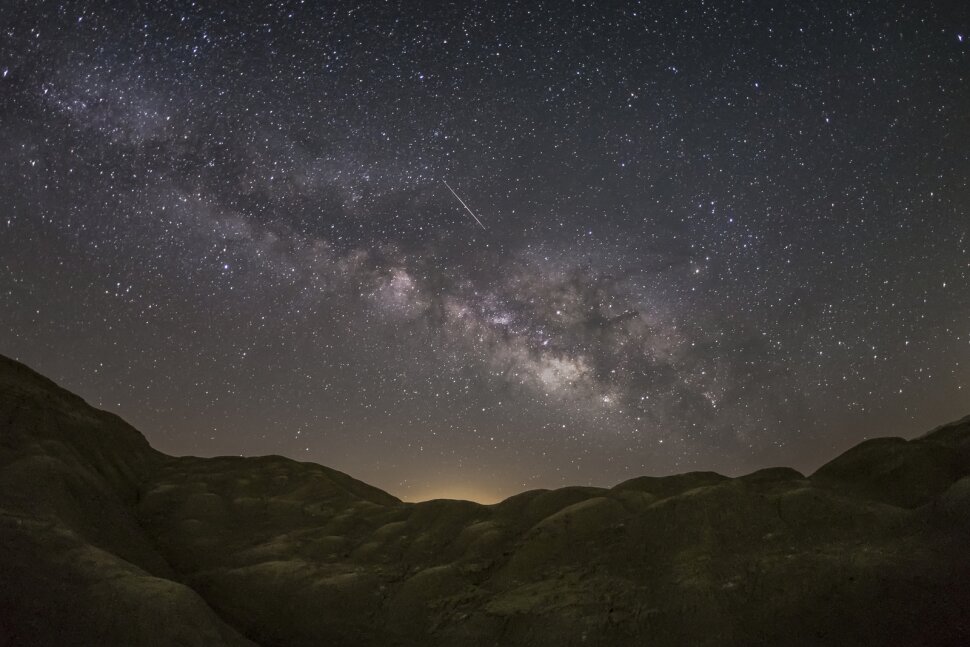
Have you ever glanced up to look at the night sky? Have you noticed that cloud-like hazy band of light arcing across the sky? What you are seeing is our Milky Way galaxy that contains our solar system. The Milky Way contains an estimated 250 billion stars. From Earth, the Milky Way appears as a band because its disk-shaped structure is viewed from within. Now, have you ever wondered if you could capture our galactic arm in a photograph? Yes, you can, and here’s how.
The best time to capture the Milky Way is from April through October with the summer months being optimal. This is because the Galactic Center lies in the direction of Sagittarius, where the Milky Way is brightest and is most seen during June through September. Because the Milky Way arcs across the night sky and covers a wide area, camera-on-tripod, wide-angle imaging is best for this type of astrophotography. The best part of wide-angle astrophotography is that you do not need any dedicated or special equipment, your basic photography gear can be used to capture the Milky Way.
First off, because night-sky photography involves extreme low light and very dim and distant celestial objects, astrophotographers use “long exposures” to soak up as much light a.k.a photons as possible. Although astrophotographers can be use exposure times anywhere from 1/500 sec to several seconds, minutes, and even hours, general exposure times for the summer Milky Way average around 25 seconds if you are not using an equatorial tracker or mount. More about that later. So, a sturdy tripod is a must. Any kind of vibration from the wind or kicking the tripod will result in a blurry image. The best camera for night-sky photography is your 35mm DSLR that can interchange lenses. What is important here is a camera that has the “manual” and “bulb” modes so that you can set your exposure times. The “manual” mode will allow you to set exposure times from 1/4000 or 1/8000 sec to 30 seconds while the “bulb” mode will allow you to open the shutter and lock it so that you can capture exposure times of 30 seconds and beyond.
Having a “full-frame” DSLR has its advantages because the sensor (chip) is larger, the pixels are larger, and this will enable you to soak up more light (photons) which helps with what we call the “signal-to-noise ratio”. A full-frame camera, meaning that the sensor covers the full 35mm film format (24X36mm), as we had with film, will also give you better resolution which is how much detail you can capture in your images. Full-frame DSLR’s also tend to have better noise reduction in low light. This is important because celestial photography deals with extreme low light and very dim and distant celestial objects. If you don’t have or can’t afford a full-frame 35mm DSLR, an APS-C “sub-frame” or “cropped sensor” DSLR will do fine. Some 35mm DSLR’s like the Canon 60Da and the Nikon 810A are optimized for night-sky photography and will do a better job at capturing the red nebulosity within the Milky Way.
Ok, what about lenses? Because the Milky Way is an extreme wide-angle celestial subject, you would be using wide-angle lenses. I recommend the prime lens over a zoom lens. Even with today’s technology, prime lenses still beat out zoom lenses for more sharpness and resolution. Prime lenses are lighter, easier to design and make and our less costly. One of the best prime lenses for astrophotography and very popular among astroimagers is the Rokinon 14mm f/2.8. It is a very sharp lens. Do a google search and you will see many images taken with this lens. Lenses with a focal length of 8mm (fisheye) and up to 50mm (your normal, standard lens) can be used to capture the Milky Way and many other celestial subjects of the night sky including meteors, auroras, constellations, the moon with an earthly landscape, satellites and more. I recommend focal lengths in the range of 10mm to 24mm for the Milky Way. Prime lenses also tend to be what we call “fast lenses” or “fast glass”. This means that they most often have wider apertures. Apertures such as f/1.2, f/1.4, f/1.8, f/2.0 and f/2.8 are examples of “fast lenses” and wide-open apertures that allow the most light (photons) onto your image during your exposure.
These lenses are also known as “light soakers” and these are a night sky photographer’s “niche” lenses. Yes, you can use zoom lens, too, but these will cost you more, be heavier and a tad less sharp. Your goal is to capture a composition of the Milky Way that will capture pinpoint stars, well exposed, little digital noise and compose for an “earth and sky connection” (adding a nice landscape subject and foreground). Lastly, be sure to set your lens focus to “infinity” before your night shoot. You can also use your LCD in “live view” mode and set your focus on the moon or a bright star. Without “infinity” focus, your stars will be soft and not sharp. Remember that astrophotography involves using “manual focus” only!
The last piece of gear you will need is a remote shutter release. You can get these corded or wireless. I like the corded ones. These plug into your camera slot so that your shutter becomes electronic and you can now capture your images without using the shutter button on the camera which induces vibration. Now that you have your tripod, remote shutter, camera and lens(es), you are just about ready to capture our Milky Way in all its splendor. Our goal is to capture the entire Milky Way’s galactic arm but also to capture each star as a “pin point”. We don’t want any streaking or trailing of the stars.
I mentioned using a tracker or equitprial mount earlier. We can purchase and set up gear that will automatically counteract the rotation of the earth. This method allows astrophotographers to capture pinpoint stars with no star trailing and also use exposure times beyond 30 seconds. With a tracker, you can expose for longer periods of time and capture more detail, such as the red nebulosity, in our galaxy. Be aware that the longer your exposure times, the greater chance for digital noise and capturing the skyglow so it is important to plan for summer Milky Way shots in a dark sky location or invest in a specialized light pollution filers like a clip-in CLS filter.
For those of you who do not want to deal with tracking gear and software, you have the basic and more simple option of “non-tracking” of your celestial subjects. This simple approach is just a matter of setting up your camera on a tripod with a remote shutter release, a wide-angle lens and setting your exposure for no more than 30 seconds. Exposure times of 25 seconds or less will generally avoid star trailing in your images but there is a method called the “500 rule” that will help determine with more accuracy your long exposure times that will avoid star trailing. The formula is to divide the focal length of your lens by 500 and this number is your exposure time in seconds that should prevent trailing. For example, if you are shooting with a Full Frame sensor DSLR and a 14mm lens, divide 500 by 14 and your safe exposure time would be roughly 35 seconds. If you are using a Crop sensor DSLR then you would divide 500 by ( focal length x 1.6 ) Canon sensors have a crop factor of 1.6 where Nikon sensors have a crop factor of 1.5. Simple Right?
Remember that there are lots of variables in astrophotography and many things can go wrong in the dark under the stars. Here are some further tips and techniques for summer Milky Way imaging:
- Use a sturdy tripod
- Use a remote shutter release
- Use a 35mm DSLR (digital single-lens reflex) camera (full-frame is best)
- Use lenses in the focal length range of 10mm to 24mm
- Be sure everything is secure and steady
- Be sure to obtain “infinity” focus before you start capturing your images. This can be done by using your LCD “live view” mode if your camera has this feature and focus on a bright star or the moon or set infinity focus during daylight hours and ensure that it doesn’t move from that position later in the night. The most frustrating situation is when you cannot focus your camera and end up wasting a beautifully clear night under the stars.
- Be sure to set your camera’s shutter to “Bulb” mode
- Be sure to remove your lens cap
- Be sure to use your lens hood
- Clean your optics before your imaging session
- Capture your images at a dark-sky site
- Watch for plane trails during exposure
- Open your lens aperture to f/2.8 or less (1.2, 1.4, 1.8, 2.0)
- Use the “500 rule” to determine safe exposure times to avoid star trailing
- Compose your subject so that it connects with a nice foreground landscape or subject that makes an “earth and sky connection”
- Bracket your images
- Consider “painting with light” in which you would use a white or red light to add light and illuminate the foreground to add visual interest to the composition. This is like a painter using a paint brush to spread paint on the canvas.
I truly hope you have enjoyed reading this “how-to” article on photographing the Milky Way and remember, if you decide this is not for you, don’t forget to look up and experience one of the true celestial wonders of the night sky, our Milky Way!


